Rough guide to recording location information in the field
Aug 30, 2017 06:47 · 1087 words · 6 minutes read
The purpose of this guide is to step the reader through the basic workflow of going into the field, recording coordinates, and plotting those coordinates on a map. The reader should be able to follow the steps and learn how to record basic coordinates using only a smart phone or cheap handheld GPS. There are many apps and devices available to record location information on the market. I do not discuss all these options here but readers are encouraged to explore and install alternative GPS apps and devices in their own time. The objective of this guide
What you will need: positioning device
In your kitbag is a GPS device (smart phone or handheld GPS), a notebook, and pencil. Before going into the field you will need to become acquainted with your GPS positioning device. Here are some simple instructions to guide you through getting a coordinate from these devices:
iPhone Users
- Turn on on Location Services in Settings:
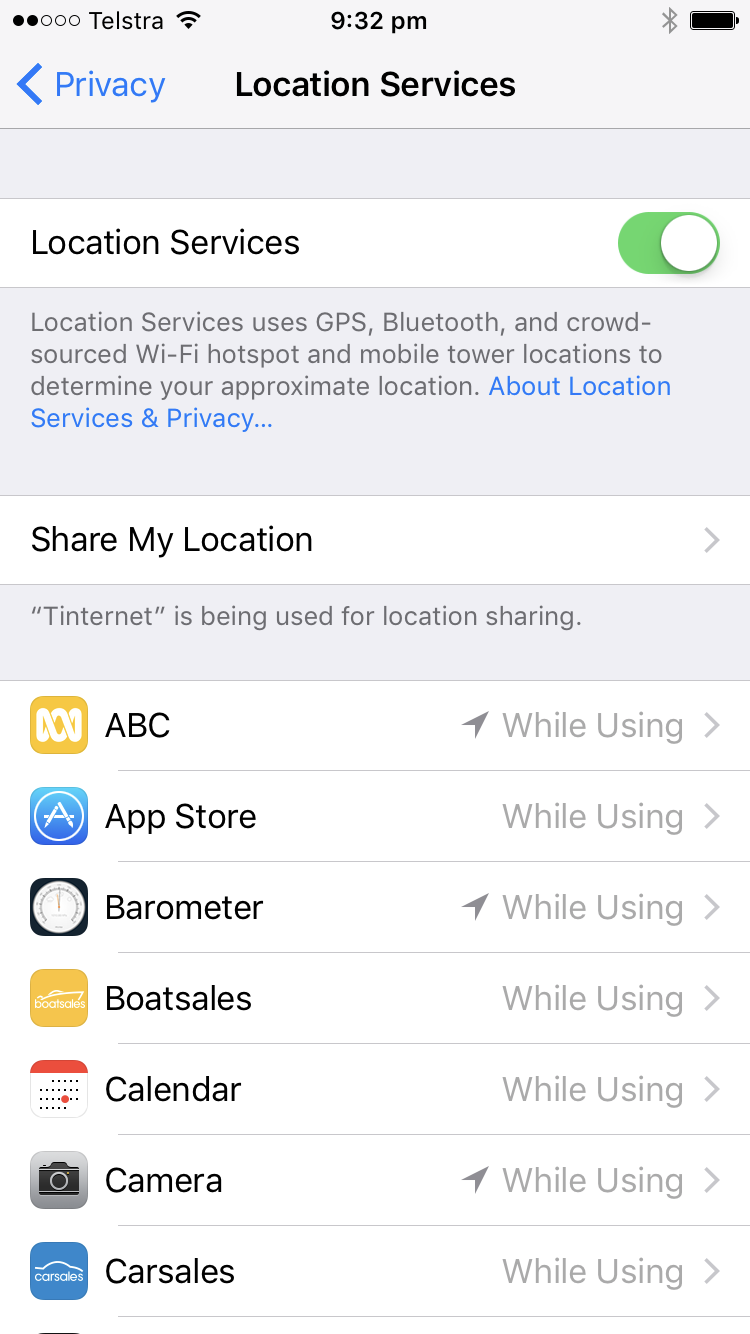
Turn on Location Services in Settings/Privacy
- Next, find the app called
Compass. - Open the Compass app and check on the bottom of the screen, below
the compass it self that a latitude and longitude is being
displayed:
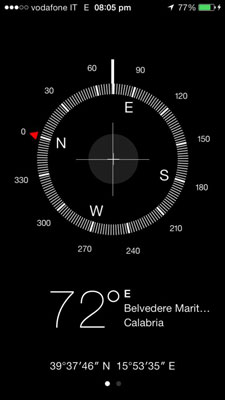
Compass app showing current position in latitude and longitude
- Ensure also you have enough battery life for the field trip. Location Services consumes energy at a greater rate when actively tracking.
Handheld GPS Users
There are far too many varieties of handheld GPS in the market for me to list all the potential options. Use the following instructions as a guide:
- Place fresh batteries in your GPS. Make sure you have spares as well.
- Always switch your GPS on a few minutes before collection location information.
- Find the data page of the GPS that lists out your current coordinates. I’ll assume you do not know how to save marks / points to the GPS and will have to record the latitude and longitude manually.
Android Phone Users
- Like handhled GPS devices, there are numerous flavours of the android operating system.
- Android phones also have a compass and GPS sensor. Here is an
example of the compass on an Oppo smart phone:
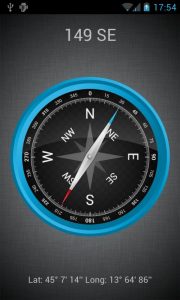
Compass app showing current position in latitude and longitude
What you need: notebook
Put some structure to your notes by laying out a simple table of notes with the following columns:
- ID
- Name
- Description
- Latitude
- Longitude
Make sure the table of marks you draw in your notebook includes enough white space for all the values you enter. Here is a sample table as a guide:
| No. | Name | Latitude | Longitude |
|---|---|---|---|
| 1 | Boundary Mark 1 (SW) | -27.49558 | 153.01109 |
| 2 | Boundary Mark 2 (SE) | -27.49556 | 153.01122 |
| 3 | Beginning of path through trees | -27.49522 | 153.01109 |
| 4 | End of path through trees | -27.49547 | 153.01091 |
Conduct field work
With your phones fully charged head out into the field and start recording marks in your notebook. Make sure that you record enough marks to establish the extent of the area under discussion. If there are multiple areas being discussed during the field trip ensure that your notes include enough information to differentiate one area from another. A numbering system is helpful here: 1.1, 1.2, 1.3, 1.4 then 2.1, 2.2, 2.3 for the next area, and so on.
Processing the location data
After a day in the field, make sure you enter the marks into a spreadsheet as soon as possible (preferable on the same day as the field work). You will pick up any errors in your data and be in the best position to address these errors when the day’s events are fresh in your mind. Processing the data is easy. You just need a spreadsheet application like Microsoft’s Excel. Enter all your marks into a table using the column names mentioned above. It is critical that the table you create in your spreadsheet has at a minimum a latitude and longitude column. The mapping application must have these columns to plot the points.
Converting from degrees, minutes, seconds to decimal degrees
By default the iPhone compass shows values in degree / minutes /
seconds and not decimal degrees. This is a problem for computers so
for the purposes of plotting these marks on a map you will need to
convert the marks to decimal
degrees.
The Australia Antarctic Division provide a web page that makes these conversions for you.
Note that in this calculator latitude values marked as “S” for south
need to be entered as negative values. For example the value: 27 degrees 26 minutes 24 seconds will need to be entered as -27 degrees 26 minutes 24 seconds.
Include additional columns where necessary
You may at this point want to include more columns in the table based on the requirements of the report you are producing and the extra details you captured on the day. Using the above sample the revised table might look like so:
| No. | Name | Custodian | GPS Lat | GPS Long | Latitude | Longitude |
|---|---|---|---|---|---|---|
| 1 | Boundary Mark 1 (SW) | J. Birrell | 27 29 44.09 S | 153 0 39.92 | -27.49558 | 153.01109 |
| 2 | Boundary Mark 2 (SE) | J. Birrell | 27 29 44.02 S | 153 0 40.39 | -27.49556 | 153.01122 |
| 3 | Path through trees | F.L. Wright | 27 29 42.79 S | 153 0 39.92 | -27.49522 | 153.01109 |
| 4 | End of path through trees | W. B. Griffin | 27 29 43.69 S | 153 0 39.28 | -27.49547 | 153.01091 |
This table is available online as a CSV file in github. Use this file to test the plotting process.
Plotting the marks on a map
To make the map we are going to use ArcGIS Online. ArcGIS Online has a simple map viewer that accepts CSV files as input and will plot the contents of the CSV file on the map. CSV files are produced by your spreadsheet application.
- In Microsoft Excel a CSV file can be produced by clicking
File->Save Asand when the file dialog box opens select the file type ofCSV (comma delimited) (*.csv). Remember where you saved the CSV file. - Go to your browser and enter the url: http://www.arcgis.com/home/webmap/viewer.html?useExisting=1
- Now find the CSV file you saved in the prior step and drag the file onto the map. If all went well the map should plot the points and automatically change the extent of the map to include all the marks you collected in the field.
- The map is interactive. You can click a point to reveal attribute information about each point.
- In the left hand side bar, you can change the appearance of the
points on the map. Make sure you click
Doneto finish the import process.